3.6 KiB
txt2img Guide
You can open the txt2img tab to perform text-to-image inference using the combined functionality of the native region of txt2img and the newly added "Amazon SageMaker Inference" panel in the solution. This allows you to invoke cloud resources for txt2img inference tasks.
txt2img user guide
General Inference Scenario
-
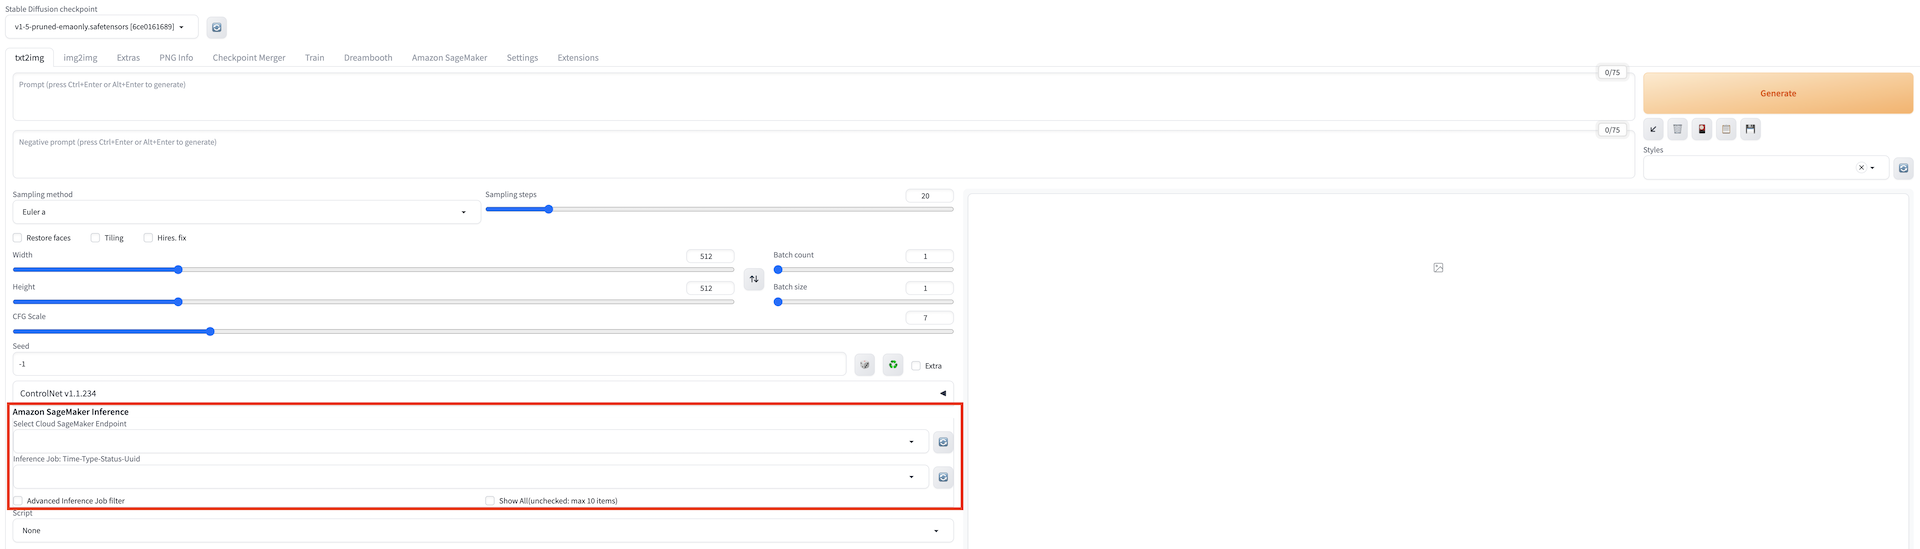
Navigate to txt2img tab, find Amazon SageMaker Inference panel.
-
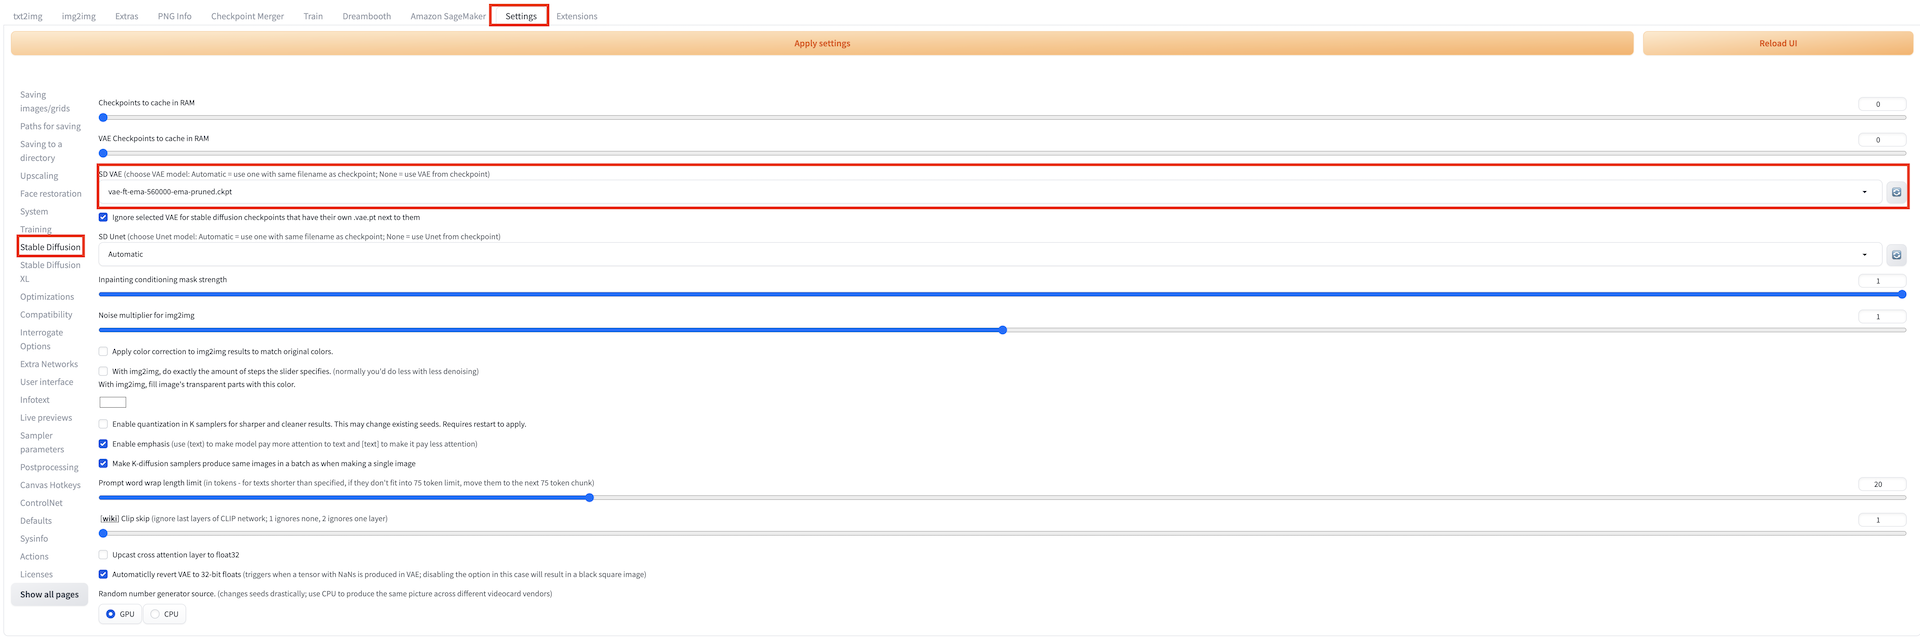
Enter the required parameters for inference. Similar to local inference, you can customize the inference parameters of the native txt2img, including model name (stable diffusion checkpoint, extra networks:Lora, Hypernetworks, Textural Inversion and VAE), prompts, negative prompts, sampling parameters, and inference parameters. For VAE model switch, navigate to Settings tab, select Stable Diffusion in the left panel, and then select VAE mdoel in SD VAE (choose VAE model: Automatic = use one with same filename as checkpoint; None = use VAE from checkpoint).
!!! Important "Notice" The model files used in the inferece should be uploaded to the cloud before generate, which can be refrred to the introduction of chapter Cloud Assets Management. The current model list displays options for both local and cloud-based models. For cloud-based inference, it is recommended to select models with the sagemaker keyword as a suffix, indicating that they have been uploaded to the cloud for subsequent inference.
-
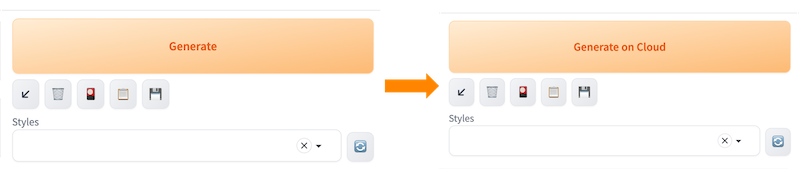
Select an endpoint for inference. Refresh and select an endpoint from Select Cloud SageMaker Endpoint dropdown list that is in the InService state. After select one InService endpoint, the button Generate will change to button Generate on Clound。
!!! Important "Notice" This field is mandatory. If you choose an endpoint that is in any other state or leave it empty, an error will occur when you click Generate on Cloud to initiate cloud-based inference.
-
Finish setting all the paramters, and then click Generate on Cloud.
-
Check inference result. Fresh and select the top option among Inference Job dropdown list, the Output section in the top-right area of the txt2img tab will display the results of the inference once completed, including the generated images, prompts, and inference parameters. Based on this, you can perform subsequent workflows such as clicking Save or Send to img2img.
Note: The list is sorted in reverse chronological order based on the inference time, with the most recent inference task appearing at the top. Each record is named in the format of inference time -> inference id.

Continuous Inference Scenario
- Following the General Inference Scenario, complete the parameter inputs and click Generate on Cloud to submit the initial inference task.
- Wait for the appearance of a new Inference IDin the right-side "Output" section.
- Once the new Inference ID appears, you can proceed to click Generate on Cloud again for the next inference task.

Inference Job
Inference Job displays latest 10 inference job by default, following naming format Time-Type-Status-Uuid. Checking Show All will display all inference jobs the account has. Checking Advanced Inference Job filter and apply filters as need will provide users customorized infenrence job list.