115 lines
6.3 KiB
Markdown
115 lines
6.3 KiB
Markdown
# Auto-Photoshop-StableDiffusion-Plugin
|
|
|
|
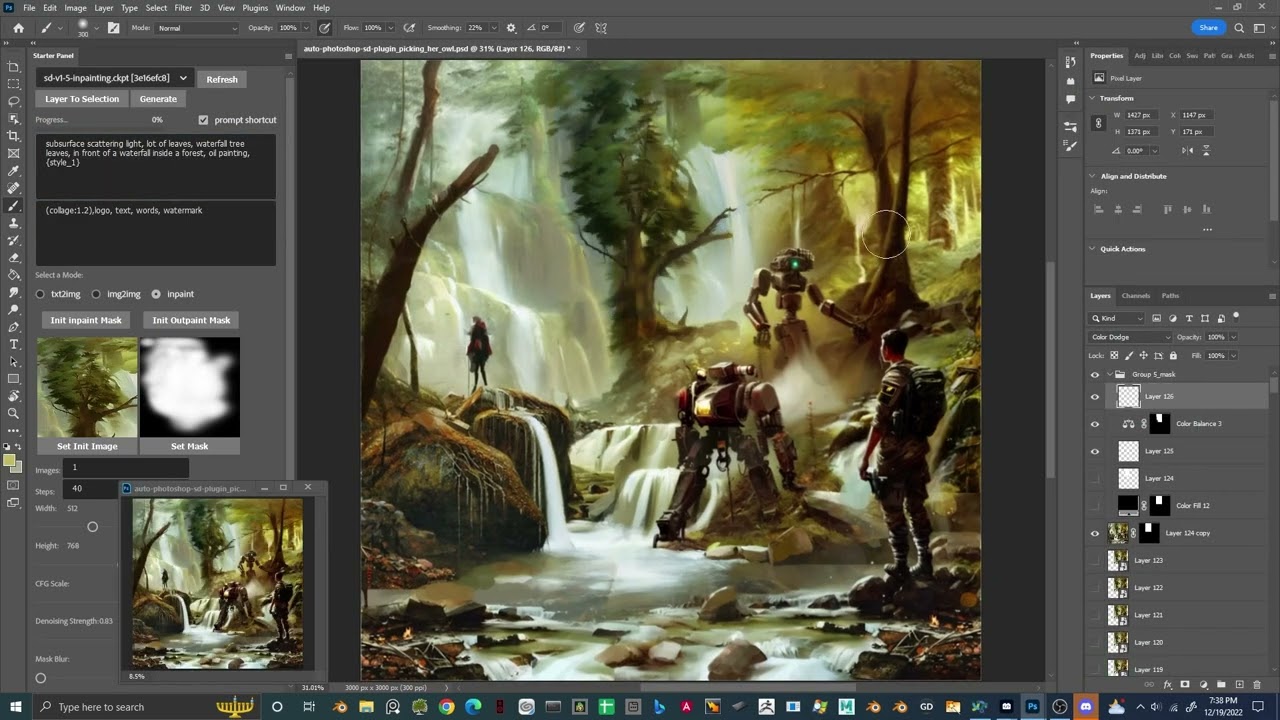
With Auto-Photoshop-StableDiffusion-Plugin, you can directly use the capabilities of Automatic1111 Stable Diffusion in Photoshop without switching between programs. This allows you to easily use Stable Diffusion AI in a familiar environment. You can edit your Stable Diffusion image with all your favorite tools and save it right in Photoshop.
|
|
|
|
### Click the picture to watch the demo:
|
|
[](https://youtu.be/VL_gbQai79E "Stable diffusion AI Photoshop Plugin Free and Open Source")
|
|
|
|
### Click the picture to learn how to use (outpaint, inpaint, img2img and txt2img):
|
|
[](https://www.youtube.com/watch?v=evjSIfYIQq0&ab_channel=Abdsart "Tutorial - Auto Photoshop Stable Diffusion Plugin")
|
|
|
|
# How to install:
|
|
## First time runing the plugin:
|
|
1) download the plugin:
|
|
```
|
|
git clone https://github.com/AbdullahAlfaraj/Auto-Photoshop-StableDiffusion-Plugin.git
|
|
```
|
|
2) run "start_server.bat" inside "Auto-Photoshop-StableDiffusion-Plugin" directory
|
|
3) go to where you have [automatic1111](https://github.com/AUTOMATIC1111/stable-diffusion-webui) installed.
|
|
Edit the "webui-user.bat" in automatic1111
|
|
change this line
|
|
```
|
|
set COMMANDLINE_ARGS=
|
|
```
|
|
to
|
|
```
|
|
set COMMANDLINE_ARGS= --api
|
|
```
|
|
that will allow the plugin to communicate with the automatic1111 project. After saving close the "webui-user.bat" file and run it normally.
|
|
|
|
4) run photoshop. go to edit -> prefrences -> plugins
|
|
1) make sure you check "Enable Developer Mode" checkbox
|
|
5) install "Adobe UXP Developer Tool" from here [Installation (adobe.com)](https://developer.adobe.com/photoshop/uxp/devtool/installation/)
|
|
this tool will add the plugin into photoshop
|
|
6) run Adobe UXP Developer Tool and click on "Add Plugin" button in the top right. Navigate to where you have "Auto-Photoshop-StableDiffusion-Plugin" folder and open "manifest.json"
|
|
7) select the plugin and click on Actions -> Load Selected
|
|
that's it.
|
|
|
|
## Steps to run the plugin for second time and onward:
|
|
1) start "webui-user.bat"
|
|
2) start "start_server.bat"
|
|
3) start "Photoshop"
|
|
4) start " Adobe UXP Developer Tool" and load the plugin
|
|
|
|
## How to Use the Plugin:
|
|
|
|
### Quick test:
|
|
1) In photoshop, start a new project.
|
|
2) After loading the plugin, don't select or change anything. Just click on the "Generate" button
|
|
3) If you see an image of a cat get loaded onto the canvas, then everything is set up correctly.
|
|
|
|
If you have an issue even after reading the following section. Please consider starting a new issue and/or join us on our [discord](https://discord.gg/3mVEtrddXJ) for real-time feedback.
|
|
|
|
### txt2Img:
|
|
1) use the rectangular marquee tool and select square (1x1 ratio)
|
|
1) in the selection tool you can set the ratio to something like 512x512 or 512x768
|
|
2) just make sure the ratio of selection is equal to the size of the image you are generating.
|
|
2) Write a prompt and click "Generate".
|
|
3) The result will be resized to fit the selected area. But don't worry, the image will be loaded into photoshop as a smart object. So you can resize it without losing quality.
|
|
|
|
### img2img:
|
|
1) Select an image that is on its own layer.
|
|
1) Optional: "Ctrl + click" the layer thumbnail. If you want the generated image to be place perfectly on the Initial image.
|
|
2) Change the mode to "img2img" in the plugin UI.
|
|
3) Click on "Set Init Image" button. If the image doesn't change to the selected layer. Click multiple times. (I'm fixing this problem)
|
|
4) Click on generate
|
|
|
|
|
|
### inpaint:
|
|
1) Change the plugin mode to inpaint
|
|
2) Create a square selection on top of an image you want to inpaint:
|
|
1) through the rectangular marquee tool
|
|
2) or through "ctrl+click" the layer thumbnail
|
|
3) Create a new layer and paint white within the selected area. Note that anything white will be regenerated by Stable Diffusion.
|
|
4) Click "Init Inpaint Mask" button.
|
|
1) Before clicking make sure you are still on the white layer
|
|
2) after clicking the plugin will generate an appropriate black and white mask and set it as the mask to be used by Stable Diffusion.
|
|
3) It will also create a snapshot of the canvas under the selected area, and will use this snapshot as the init image.
|
|
5) Click the "Generate" button.
|
|
|
|
### outpaint:
|
|
1) change the plugin mode to inpaint. Remember, outpainting is just a special case of inpainting.
|
|
2) Create a "rectangular selction" that intersect with an image you want to extend.
|
|
3) Click on "Init Outpaint Mask" this will :
|
|
1) create a snapshot of the canvas under your selection and use it as "init image" for Stable Diffusion
|
|
2) create a black and white mask and will use it as the "init mask"
|
|
3) it will update both the "init image" and the "init mask" in plugin UI
|
|
|
|
|
|
|
|
### Rule of thumbs:
|
|
* To get the best result for inpainting and outpainting you must select the "stable-diffusion inpainting model"
|
|
* An "init image" of img2img must not have transparency in it.
|
|
* Always check the "init image" and the "init mask" in plugin UI and make sure they match the layers on the canvas. To fix a mismatch, do:
|
|
* Select the "group_mask" in the layers panel and click on "set init mask" button.
|
|
* Select the "group_init_image" in the layers panel and click on "set init image" button.
|
|
* After selecting a model, you may need to wait for it to be loaded in Stable Diffusion before you should hit Generate.
|
|
* Check the progress bar if it's stuck at 0% or 1%: You could always cancel/interrupt the request if you think it's taking too long and regenerated again.
|
|
* Don't open multiple photoshop documents. For now, this will break the plugin. Only work on one project at a time.
|
|
|
|
### Issues with img2img, inpaint or outpaint:
|
|
img2img, inpaint and outpaint use photoshop "quick export as png" feature under the hood.
|
|
|
|
At random quick export as png will break, this is a known photoshop bug.
|
|
|
|
To test if the feature is broken and is the cause of your issue, do the following:
|
|
|
|
select a layer and right click on it, then select quick export as png. if you get prompted with a windows, then the quick export works fine.
|
|
However if nothing happen then you will need to restart photoshop and try the export feature again, until it works.
|
|
|
|
if it work then you could procced to use the plugin.
|
|
|
|
until you get it to work the img2img, inpaint and outpaint will not function correctly.
|
|
|
|
|